Overview
Sorry for not posting anything for almost a year. So many good ideas died inside my brain and thought now I should again start posting something (good or bad). This time I came up with enhance filter to achieve multi-level filtering of a SharePoint List View web part. Although the default list view comes up with a search box that is very handy the only limitation being that you can do filtering only at one level. The default search box can look at multiple columns but only one search at a time.
Our Custom jQuery filter – some screen shot.
This is what I have come up with, although it needs more work to make it more dynamic…the current version does the basic job of multilevel filtering.
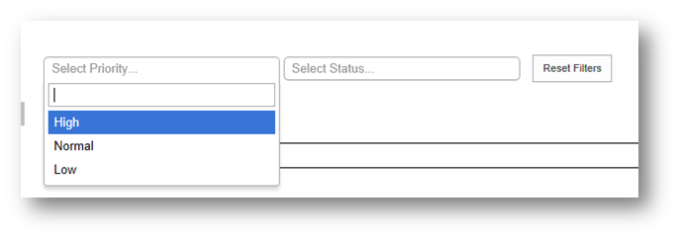
Below is the screen capture of the filter user interface. Much of the credit goes to jQuery-Chosen plugin to make it look so awesome. Thanks a lot Patrick Filler and Team for coming up with this wonderful plugin.
Alright enough of show-off for now, let me dig onto the code and other details.
Solution Files
This solution consists for 5-files. 4 of them related with jQuery:Choosen plugin and 1 for my poor script J
- css/choosen.css
- css/prism.css
- js/prism.js
- js/choosen.jquery.min.js
- filter-UI.html : Contains the filtering logic and reference to all the above file.
All the source files could be downloaded from GitHub – SudhirKe à splist-filter repository.
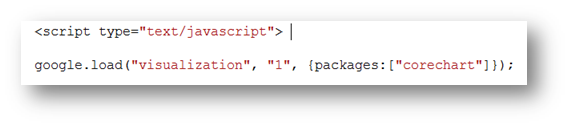
Definitely we will need to have reference for jQuery library, I think by this time all browsers should decide to load jQuery for every page I am so much in love with this.
Script References:
First step is to upload the source file onto Site Assets (or any other library) and add the references to CSS and JS files.

HTML Code
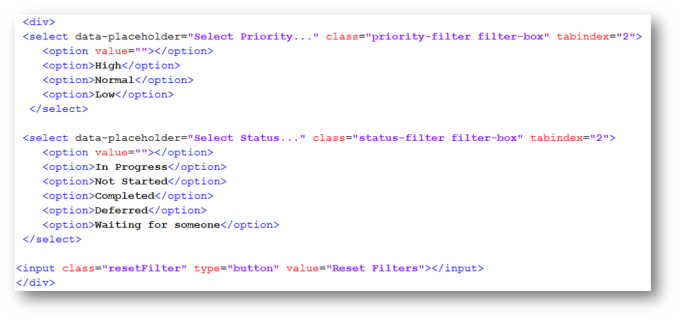
HTML Code for filter is very easy, you just add drop down with filter options and another button for clearing the filters.
TODO: A much nicer version would be to pull all the available values based on the list columns, however that will require some more configuration on to the drop downs J
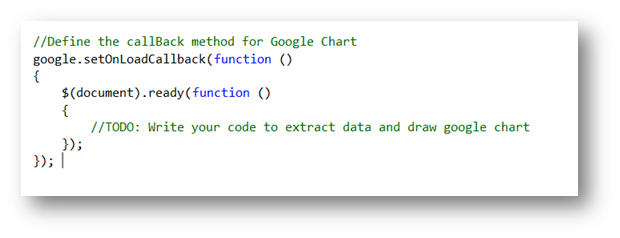
jQuery Script – The Magic
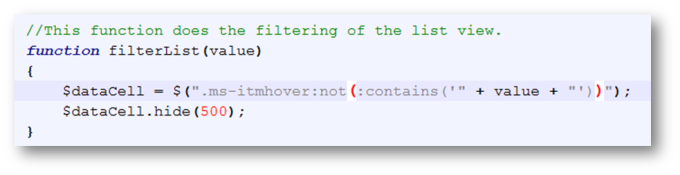
Filter Function
With SharePoint 2013 list views, every data row has a class called .ms-itemhover, this makes our job very easy since we can just look for the selected value in every row and hide everything else.
Here is how my generic filter function looks like, notice that I am passing the value to my hide and show functions, this will hide the rows really slow and makes it look fancy.
Drop down Modification and filtering the records
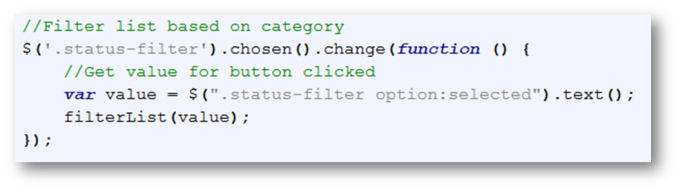
In this code I am converting my simple drop downs onto more fancy choosen drop down and handling the change event for them. Notice that I am just calling the filter function to do the magic. Same code exists for my other filter drop down.
Reset the filters
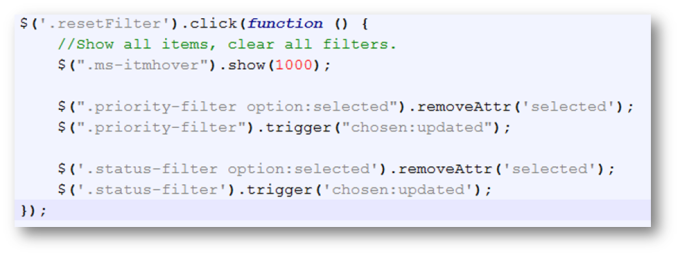
Last part of this code is to clear all the filters. This will also clear the previous values from the drop down and show all rows (.ms-itemhover).
Source Code:
Here is all the source code together for reference, same could be downloaded from the link given in solution files.

Putting the code on your SharePoint:
This is the easiest part of all the scripting, below are the steps for you (kind of checklist).
- Download all the codes from GitHub – SudhirKe à splist-filter repository.
- Upload all the files to Site Assets (or any other library) in your SharePoint site.
- Add a list view web part onto your page (or use a page where it is already added).
- Edit the page and add a content editor web part.
- Update content editor web part and change the source link to point to filter-ui.html (e.g. http://yoursp/sites/yoursite/SiteAssets/filter-ui.html
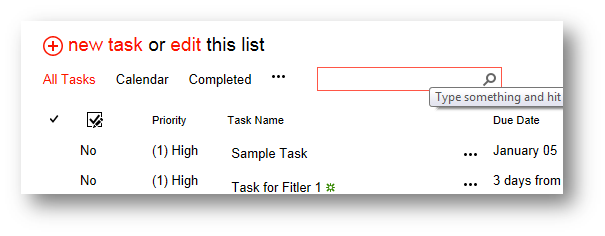
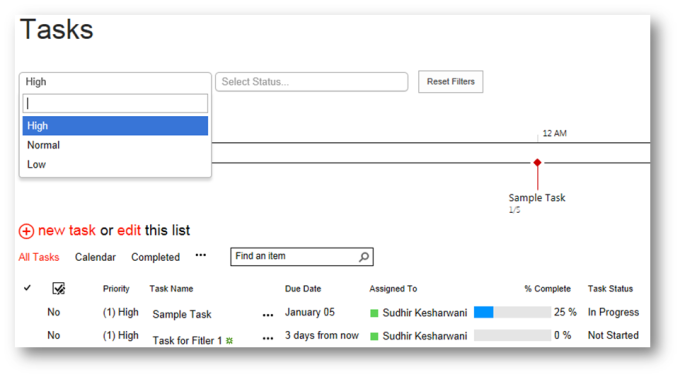
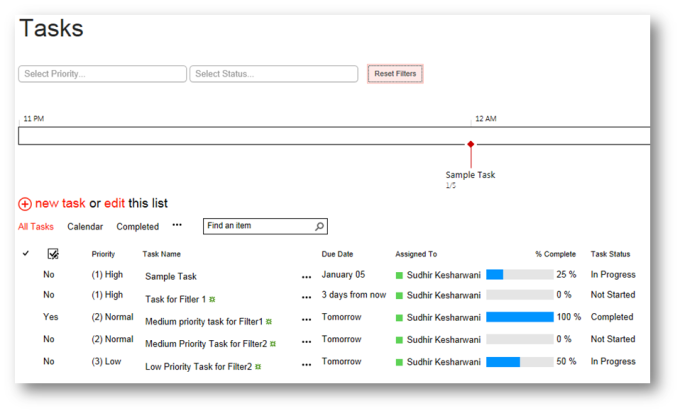
If everything is done correctly here is how your filter page should look like ( I have added the generic Task list for this example).

Selecting Priority “High” should filter the rows for me.
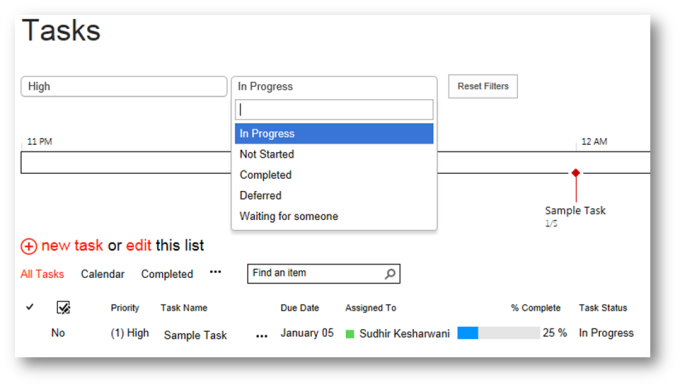
Further selecting Status “In Progress” will hide the other rows and display only one row.
Clicking on “Reset Filters” button will make all the rows visible again.
Hope this helps someone in need. Feel free to leave comments on this blog. Once again many thanks to jQuery Chosen plugin mastermind Patrick Filler and team.